
How to connect a live server with SSH access?
Hello Artisans.
This article goes into detail on How to connect a live server with SSH access (Hostinger). I’m going to show you how we can connect a live server with SSH CLI or Putty. In this article, we will see how we can connect the live server with the SSH CLI command and Putty.
We will see two ways to connect a live server with SSH let's see the first one
How to connect a live server with SSH CLI Command
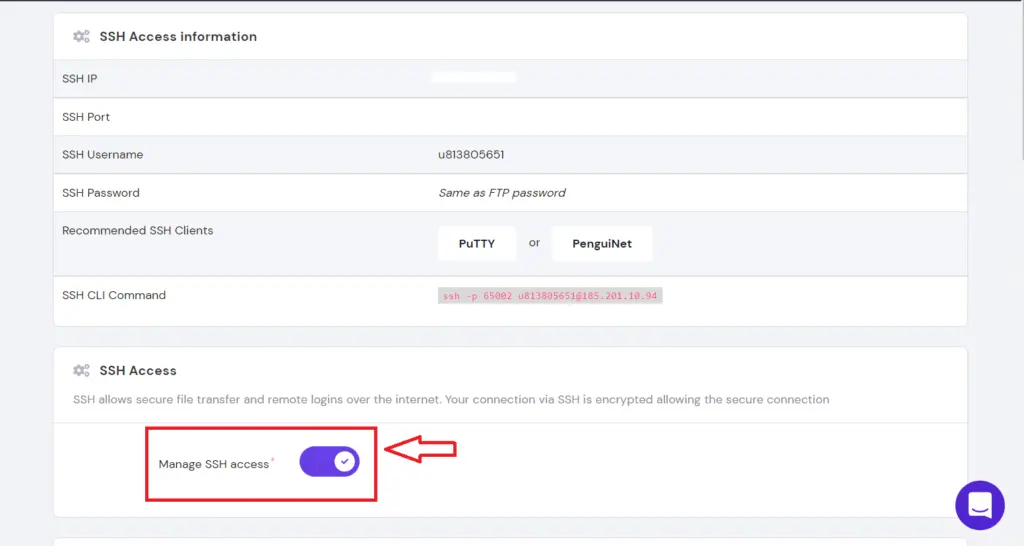
Step-1: Enable SSH access from SSH tab
Go to the SSH Access page to enable permission.
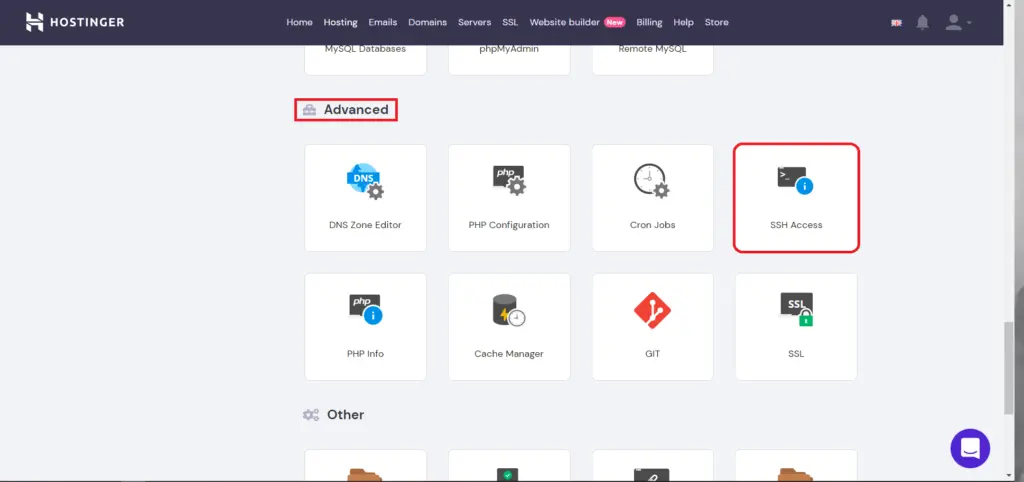
Enable SSH Access from the SSH access page.
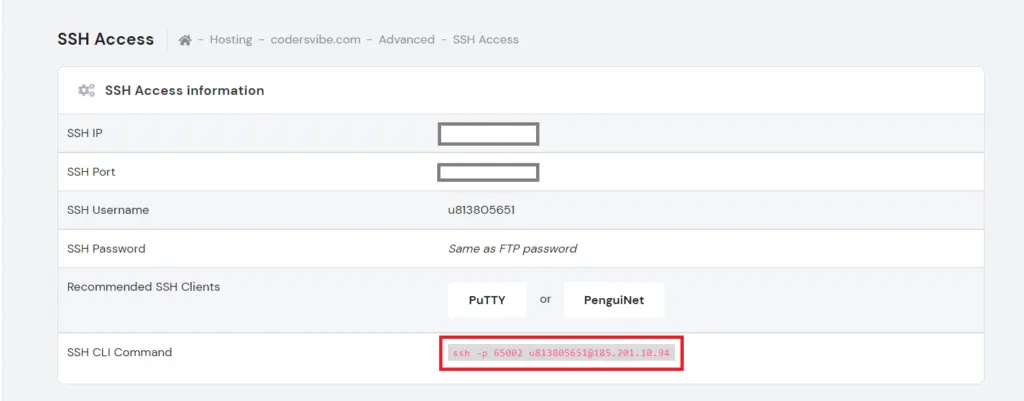
Step-2: Copy SSH CLI Command
Copy the SSH CLI Command from the SSH section
paste SSH CLI Command in CMD and press enter
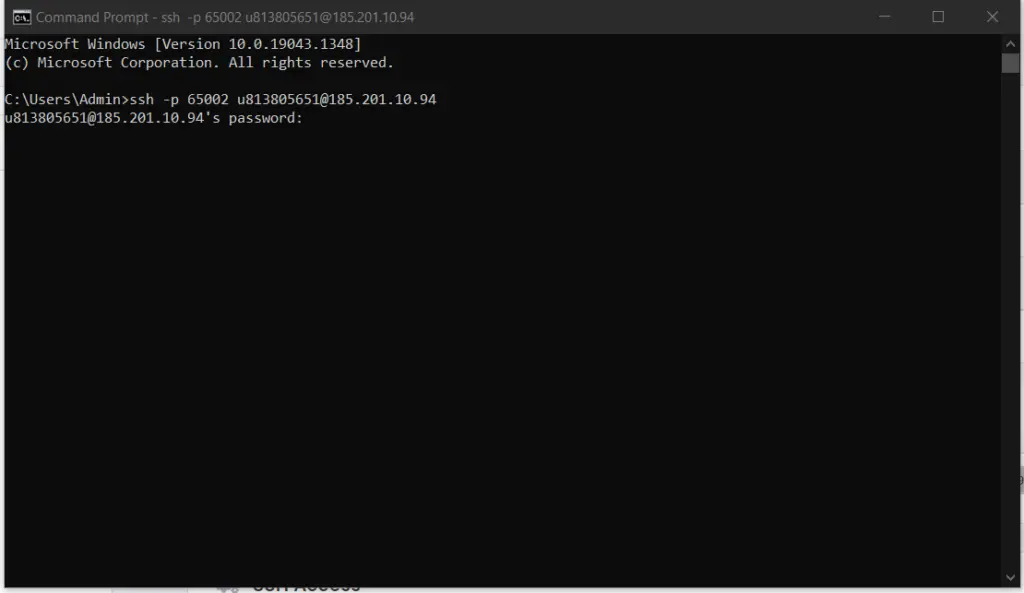
then it will ask you for a password. Type your password and press enter.
Note:
- Password is your FTP account's password, which will have used here.
- When you type the password it will not show you anything but it's working don't worry.
after putting in your password, press enters to connect successfully with your server. Now you can do anything on your server.
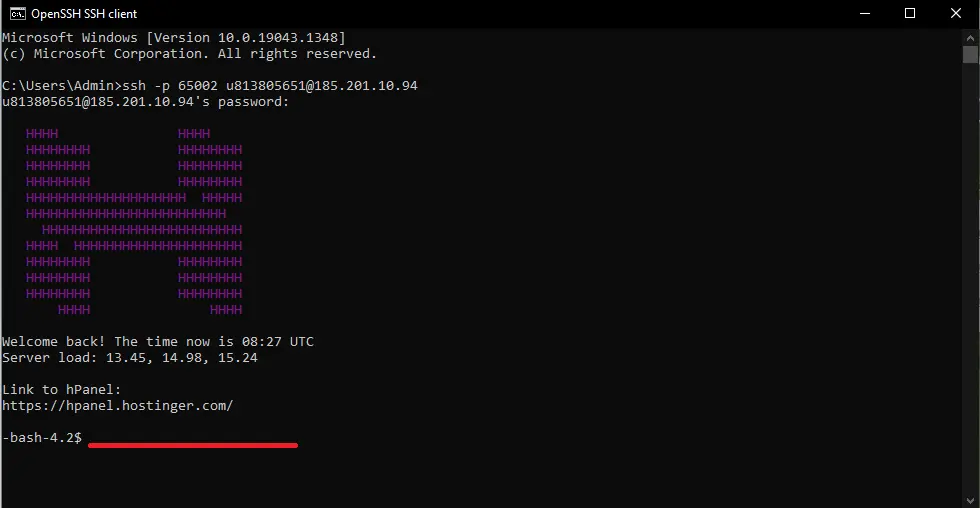
Let's move on to the second method, now we will connect with Putty.
How to connect a live server with Putty
Step-1: Install Putty
First, you need to install putty in your system, you can download it here https://www.chiark.greenend.org.uk/~sgtatham/putty/latest.html
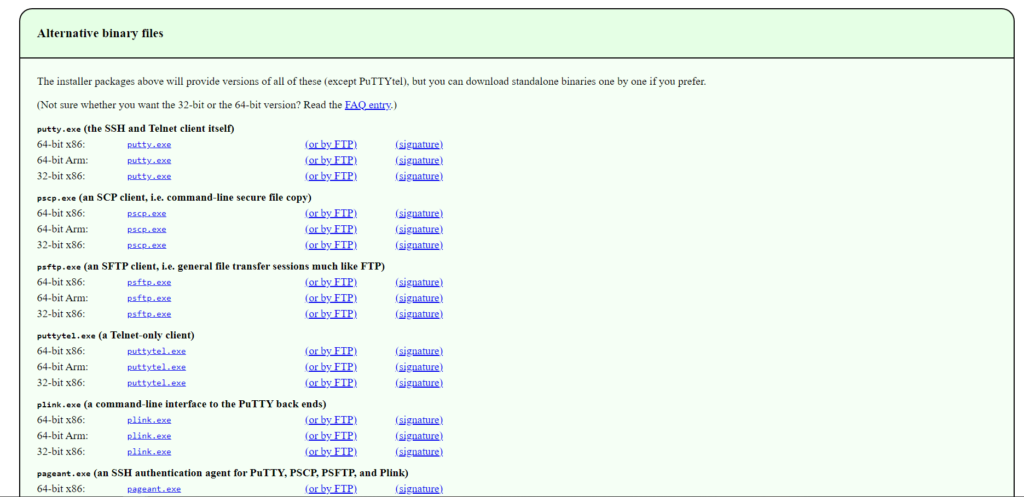
after downloading putty install it opens Puttygen. In Puttygen we will create a key-pairs of the public and private key
Step-2: Create key pairs of public and private key
Open puttygen, select the RSA radio button, and press generates button. After pressing generate button it will start creating key pairs and move the cursor on empty space to make some randomness in the key.
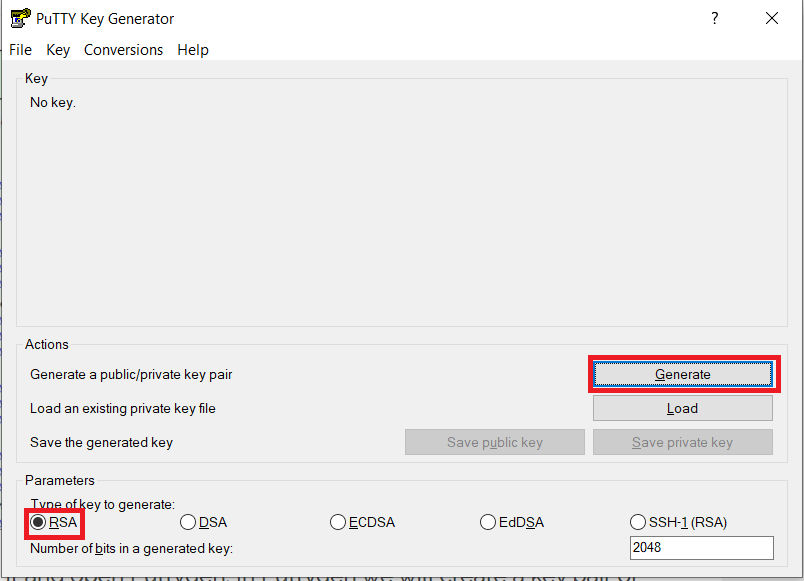
After the complete process, it will show you something like this. Just save this key as a public key by pressing Save public key and same as for saving private key just press Save private key and save it with any name.
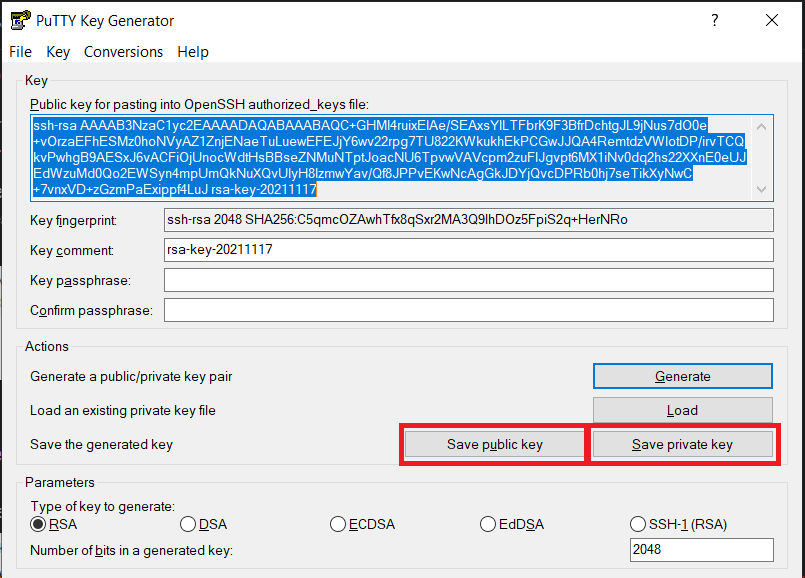
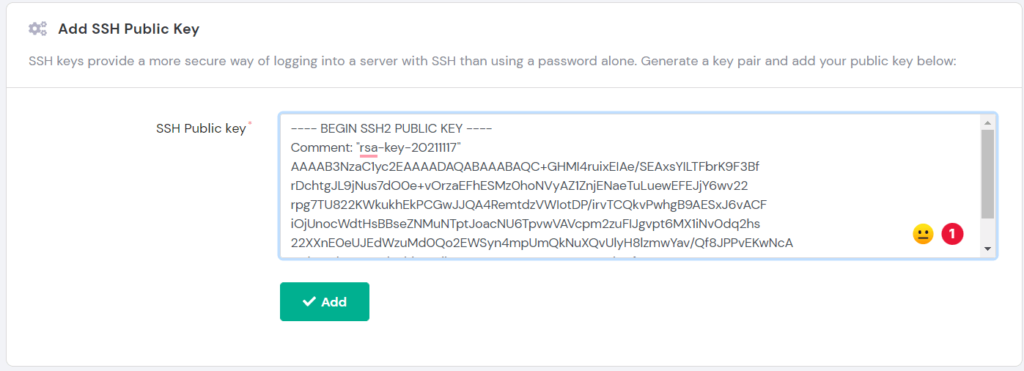
add your public key on your server as shown below.
Step-3: Open Putty and connect with private key pair
Open putty and give required information just following as below
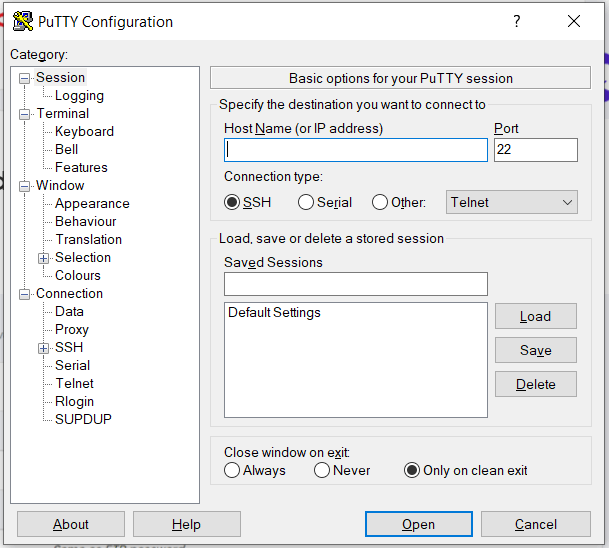
you can get SSH IP and SSH Port from here

now add private key here to match with the public key that we have added on server.
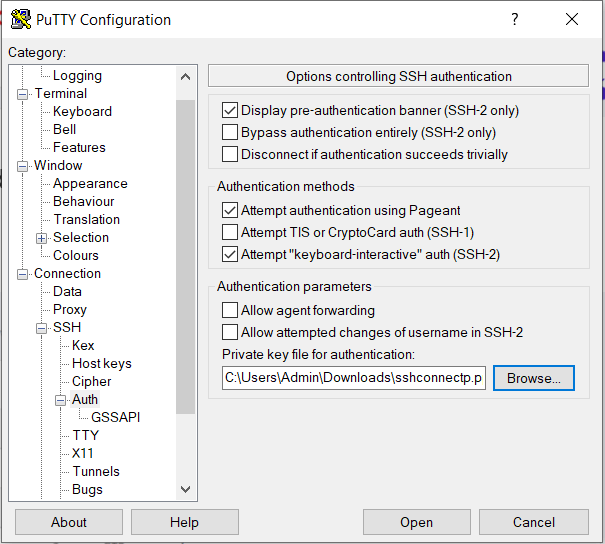
just press open now and you will connect with your live server with putty.
I hope it will be helpful for you. You can ask me in the comment section.
Happy Coding :)


